Hello, my name is Suci TiaraNita, I am 20 years old, I am student of STKIP PGRI Lubuklinggau city and I was fifth semester, the major English Education Study Program . I want to give so many information about the method based on about Language Teaching Media Based on ICT.
The first I want to explain about how to using website, Especially email.
The following steps show you how to send an email using a Gmail
account. However, many email accounts or applications follow a similar
process for creating and sending a new message.
You’ll need:
- a computer with active internet connection
- an email account set up and ready to send and receive emails.
Follow these step-by-step instructions to send an email
Step 1: Log in to your Gmail account so that you are on the dashboard (main page) of your mail account.
Step 2: Click Compose.
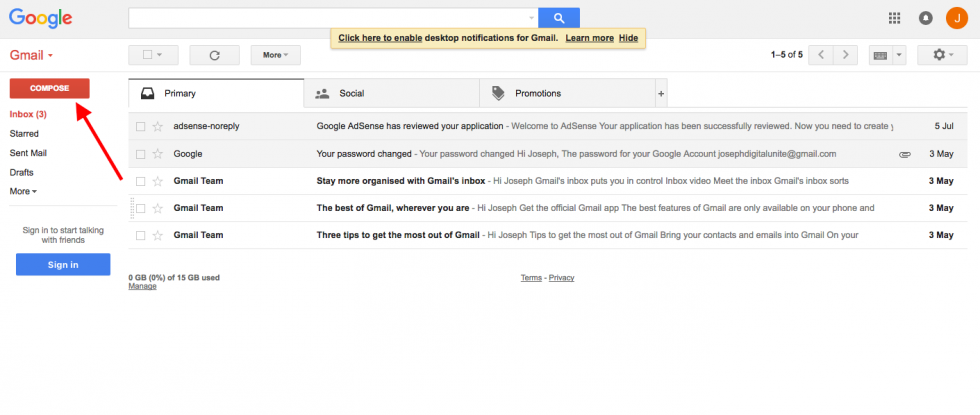
Step 3: A new blank email window will open up. In the ‘To’ box, type in the email address of the recipient.
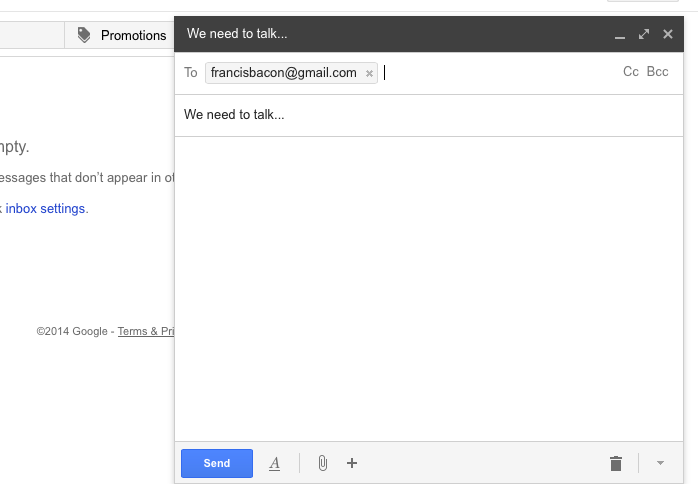
Step 4: You might want to include someone else in your email to ‘keep them in the loop’. You can do this by clicking Cc or Bcc,
which will open another field. ‘Cc’ means ‘carbon copy’ and ‘Bcc’ means
‘blind carbon copy’. Adding an email address to the ‘Cc’ field means
that that person will receive a copy of the email and all the other
recipients will see their email address. If an email address is put into
the 'Bcc’ field, the person will get a copy of the email but no other
recipient will see that address.
If you are sending the same email to lots of different people, it’s
a good idea to put all the email addresses in the ‘Bcc’ field to keep
your ‘mailing list’ confidential. That way, there’s no chance that it
could fall into the hands of a spammer or hacker.
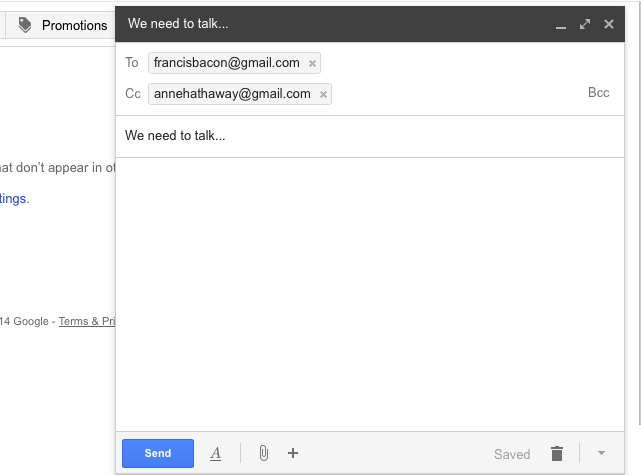
Step 5: The subject field allows you to give the
recipient an idea of the topic of your email, like a heading. You don’t
have to put anything in the subject box, but it can help when viewing
and sorting email.
Step 6: Email text can be formatted in a similar
way to text in a word document. You can change the font style, colour
and size using the formatting icons. You can also create bullet points
and check the spelling of your email. Choose your formatting from the
menu shown.
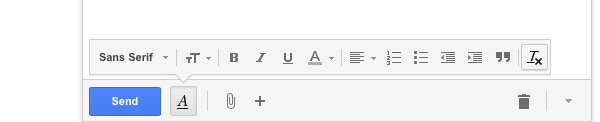
Step 7: Type your message in the main body field of your email.
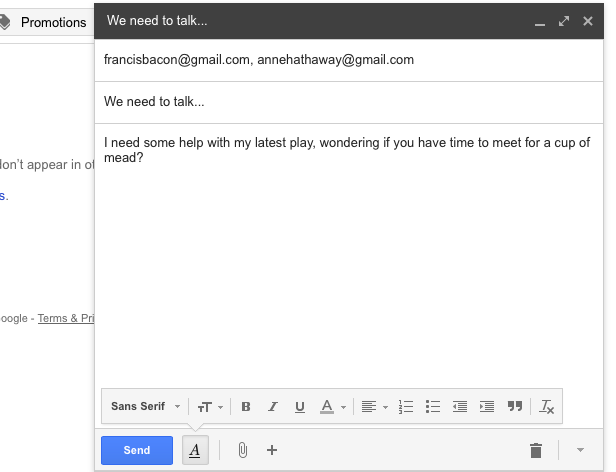
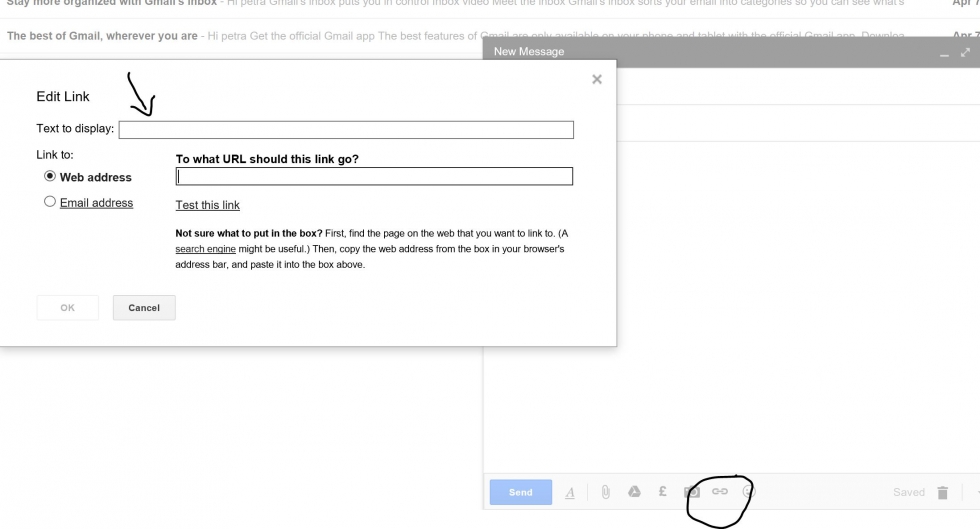
You can format your email using the options that are available on
the toolbar. To add a link in the body of your email click on the insert
link icon, then add the 'Text to display' and then a web or email address, finally click OK.
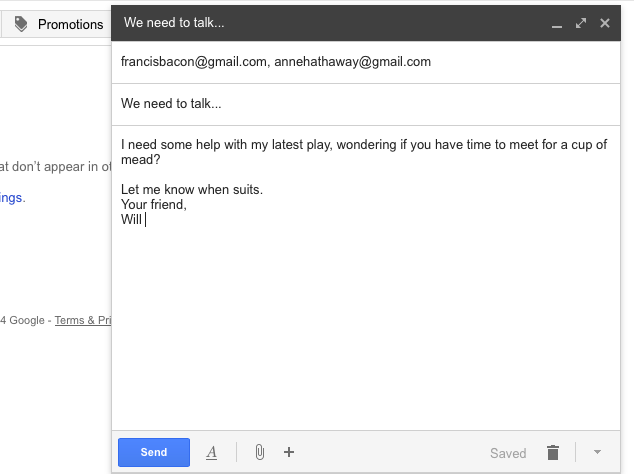
Step 8: When you’re happy with your email, click the blue Send button at the bottom of the compose window.
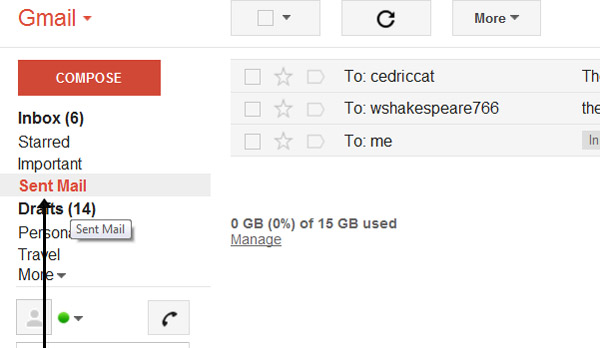
Step 9: The email you’ve sent will now be stored
in the ‘Sent Mail’ folder on your Gmail dashboard. You may have to run
your mouse pointer over the Inbox folder link to see the other folders.
Step 10: You may start an email but then decide to
come back to it later rather then sending it straightaway. Gmail saves
your drafts automatically. So you can simply close the email and the
unfinished email will be saved to your ‘Drafts’ folder. When you decide
that you’re ready to send it, you can retrieve it from the ‘Drafts’
folder by clicking Drafts and then clicking the correct item in the ‘Drafts’ folder list. Finish the email and click Send as normal.

Tidak ada komentar:
Posting Komentar